
Adding Multiple Choice Question
Instructors can add Multiple Choice Questions in two ways: by adding one question at a time using the “Add” option or by importing multiple questions through an Excel sheet.
Approach 1: Adding Individual Questions
- Navigate to Assessments > My Question Bank. The My Question Bank page will display.

- Select Course and Question Type: Choose the appropriate course level where you want to add the questions, then select Multiple Choice as the question type, and click the Add button.

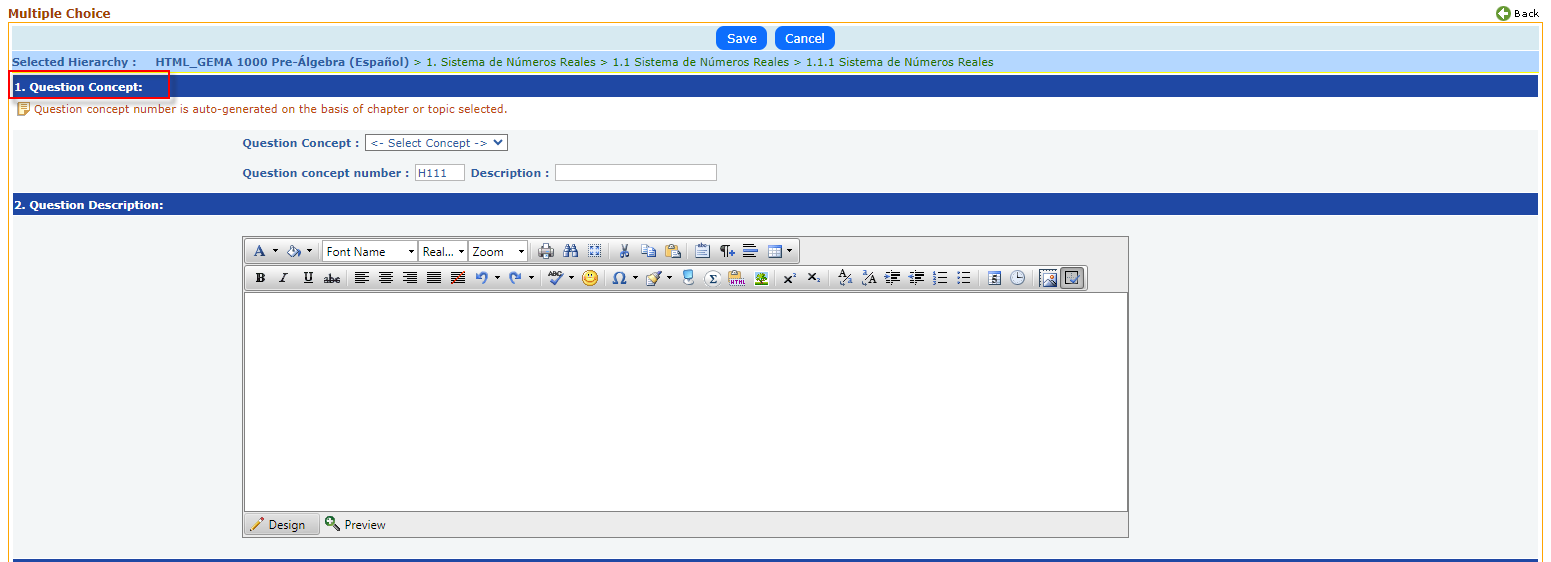
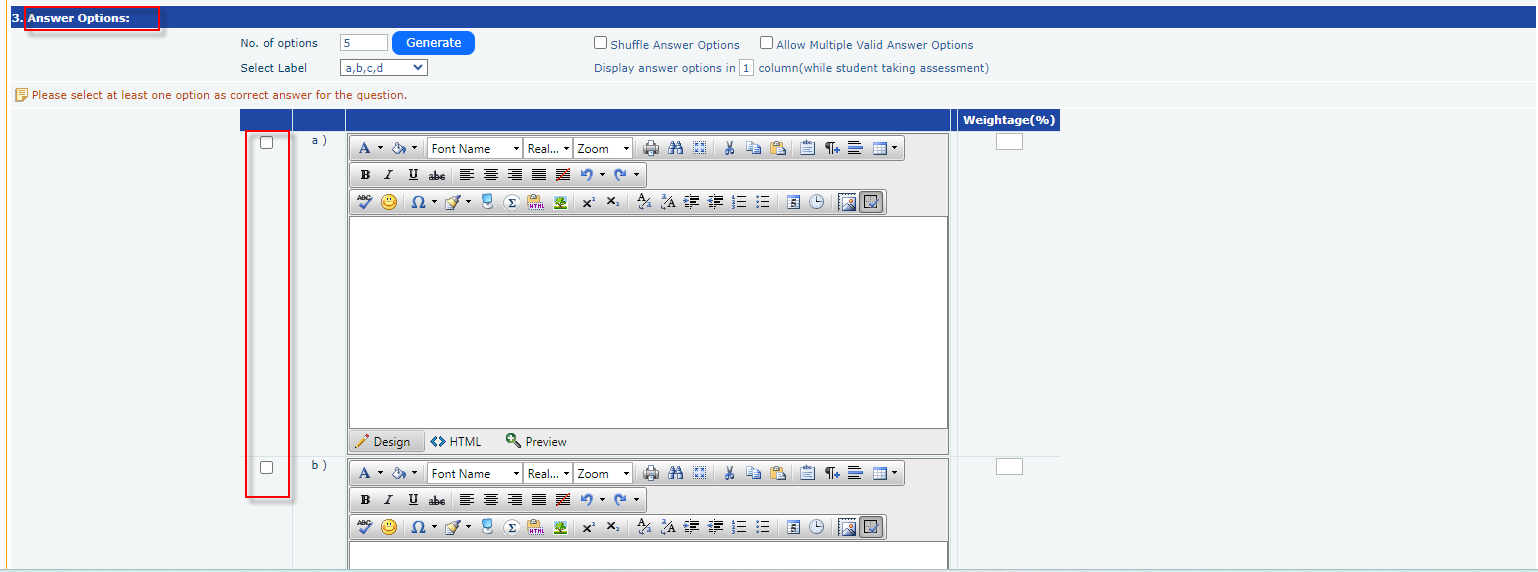
- Enter Question Details: On the next screen, enter or select the Question Concept, Question Description, and Answer Options.
- Save the Question: Click the Save button to store the question data. The saved question(s) will be listed, and you can use the links in the last column to view, edit, or delete them.

Approach 2: Importing Multiple Questions from an Excel Sheet
- Click on Import: Select the Import from Excel Sheet button.
- Download Format: The import question page will appear. Click on View Format to download the template for the Excel sheet.

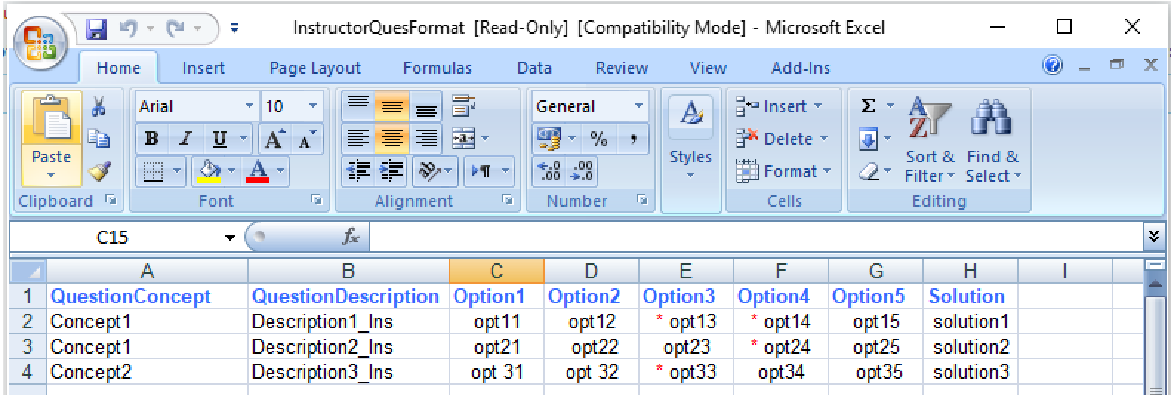
- Fill in the Template: Refer to the sample Multiple Choice Question format in the downloaded Excel sheet and enter the relevant information in the appropriate columns.
- Ensure Format Matches: Make sure the format of your completed Excel sheet matches the provided sample format.
- Upload the Excel File: Click on Import from Excel to upload the questions.
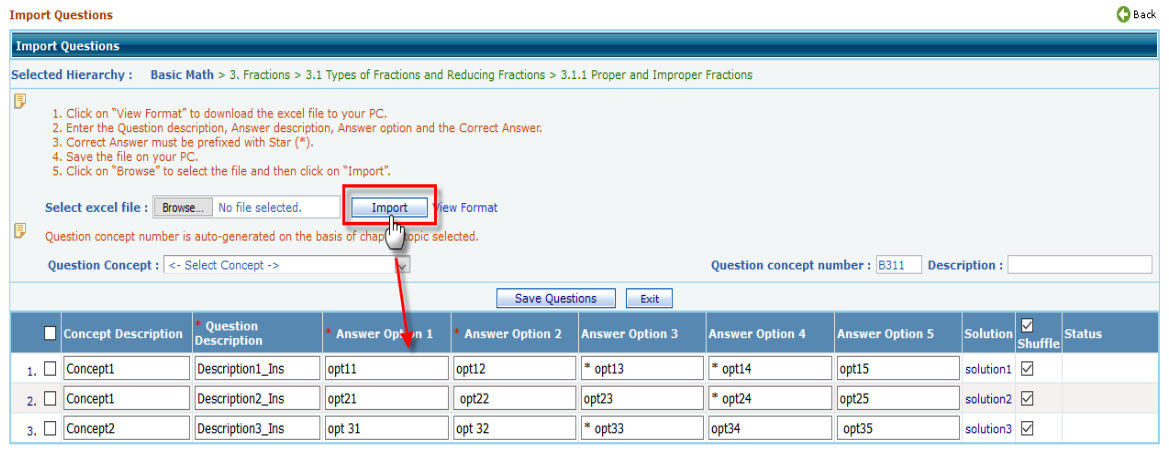
- Verify Imported Questions: Review the imported questions and their details. You can edit them at this stage if necessary. Once you're finished, select the questions and click the Save button.
- Access Saved Questions: The saved questions will be listed under the selected level and can be used when creating assessments.